

The Basic Elements Building Blocks are headings, paragraph text, and links to convey information about your course or content. After adding the Starter Kit to your course, these basic elements can be used within the HTML editor in Brightspace.
Course sites use Lato, the Brightspace default, as the standard font family. However, there are some important things to consider before adding basic text to your course.
Considerations
- Do: Use the standard formatting and styles that come as default with Course Maker.
- Don't: Override size, alignment, or color of headings, text or links.
Heading
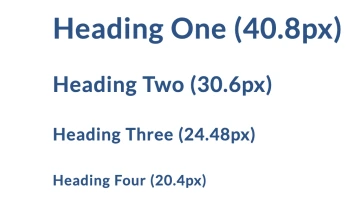
Use headings to create a hierarchy and structure for your page. A heading is a title or subtitle that provides a structural hierarchy to the page. There are four heading levels in the Course Maker style. The size of our headers was chosen to meet accessibility standards and best practices. To continue to meet accessibility guidelines as you add content to your course site, heading styles should be used in cascading order.
Additional Resources
- DRC IT Accessibility: Heading the Right Direction in Your Content
Explore
Preview
Apply
Instructions
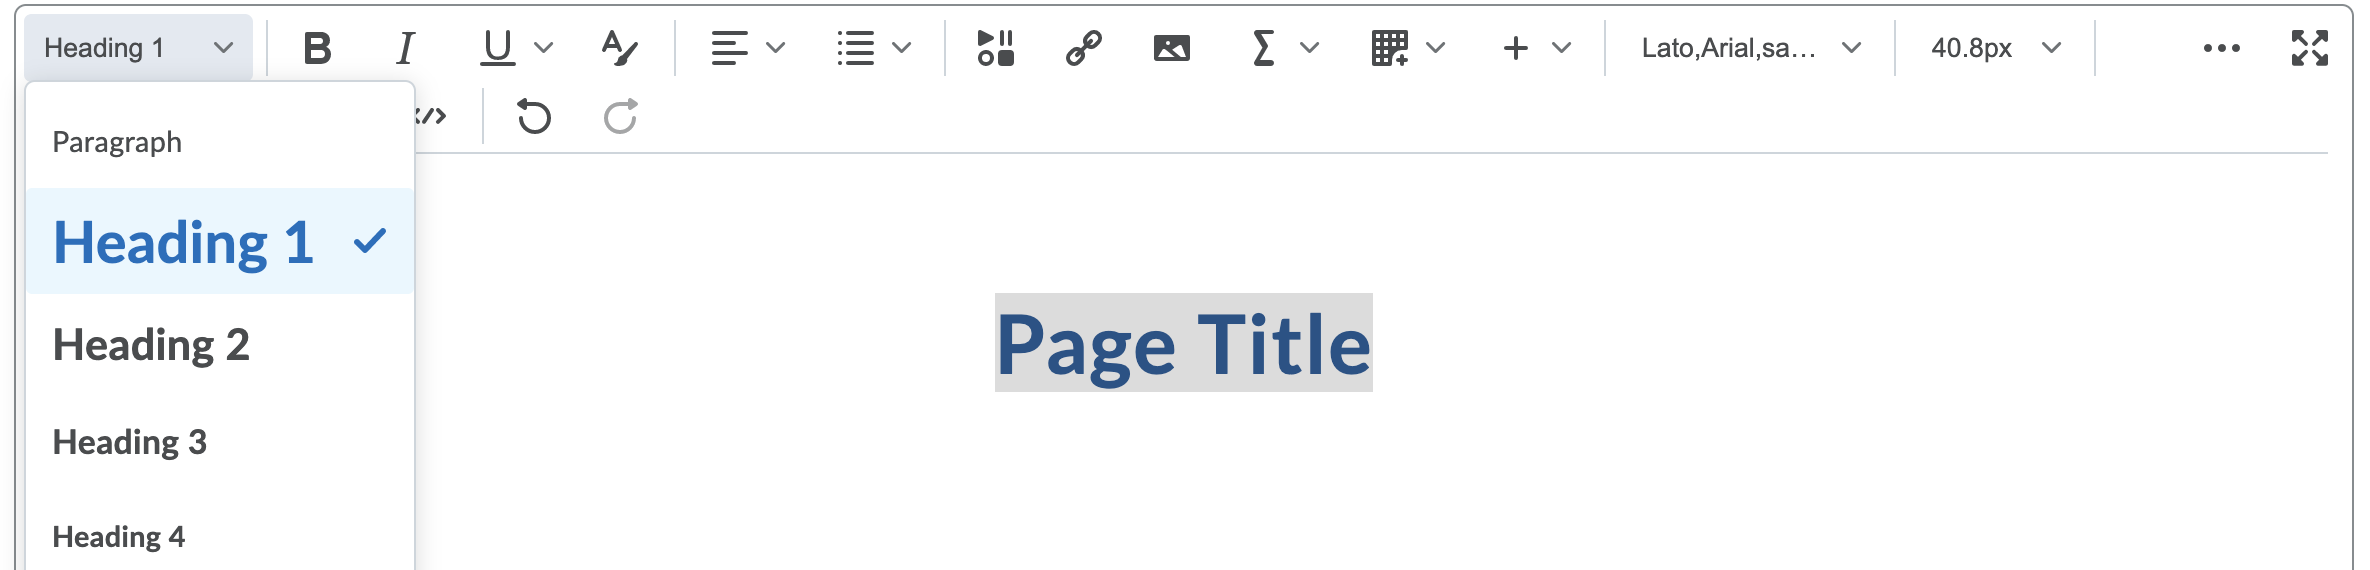
- Go to the course page and click Edit HTML.
- Type your heading text and select it.
- In the Format dropdown, select the appropriate Heading style.
Alternative Option: Copy the code of the appropriate heading below and paste into the Brightspace Source Code editor.
Considerations
- Do: Create and follow a hierarchical order. Web pages should have only one Heading 1 and then heading styles should be used in cascading order.
- Don't: Insert heading tags from the Format drop down into tables.
- Don't: Change the default heading sizes or fonts.
- Don't: Change the colors of the headers unless you check the color for contrast accessibility.
Code
Heading One
<h1>Heading One</h1>
Heading Two
<h2>Heading Two</h2>
Heading Three
<h3>Heading Three</h3>
Heading Four
<h4>Heading Four</h4>
Text Styles
Paragraph text is used as the default body text for your course content. Your course uses Lato, the Brightspace default, as the standard font family.
Big text, bold text, and emphasized text styles can be used to highlight important text within paragraphs. Small text styles can be used for image and table captions.
Explore
Preview

Apply
Instructions
- Go to the course page and click Edit HTML.
- Type your content and highlight it
- In the Brightspace editor toolbar, select the appropriate text style such as B for bold text and I for emphasized or italicized text.
- For the big text and small text styles, copy the code below and paste into the Brightspace Source Code editor.
Considerations
- Do: Use normal text for the majority of course content.
- Don't: Replace Lato with another font or mix with another font.
Code
Regular Body Text
<p>This is a regular body text.</p>
Big Text
<p class="uacm-text-big">This is a big text.</p>
Small Text
<p class="uacm-text-small">This is a small text. </p>
Bold Text
<p>This is a <strong>bold text</strong> example.</p>
Emphasized Text
<p>This is an <em>emphasized text</em> example.</p>
Link
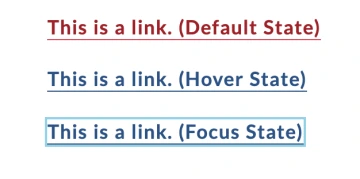
A text link or hyperlink completes an action by taking the visitor to different content within the site or an external site or resource.
Best Practice: Use clear and concise link text to create a polished course site. Descriptive link text is not only an accessibility best practice; it is a web design best practice too.
Additional Resources
- DRC IT Accessibility: Hyperlink Text
- WebAIM: Links and Hyperlinks
Explore
Preview
Apply
Instructions
- In the Brightspace HTML editor, highlight the text you want to make into a link.
- Select the Insert Quicklink 🔗 button from the toolbar.
- In the Insert Quicklink popup window, you can create two types of links: course content or an external webpage.
- Select the appropriate content, such as an assignment, quiz, or rubric for course content. Then click on the Insert button.
- For an external web page, select the URL option from the Insert Quicklink popup window.
- In the URL text box, paste or type in the complete URL.
- In the Title text box, add a description of the link. Any highlighted text from step 1 will automatically populate in the Title text box.
- Under Target, select New Window.
- This will open the link in full screen and a new tab. This is the recommended option, as other options make it difficult to navigate back to your content after opening the link.
- Click the Insert button.
Considerations
- Do: Write descriptive links that are human-readable and screen-reader friendly by describing what is being linked to.
- Do: Keep link text short to make the page more scannable.
- Don't: Use "click here" or "read more" as links.
- Don't: Use extremely long links such as URLs.
Code
<a href="#link-here">This is a link.</a>